
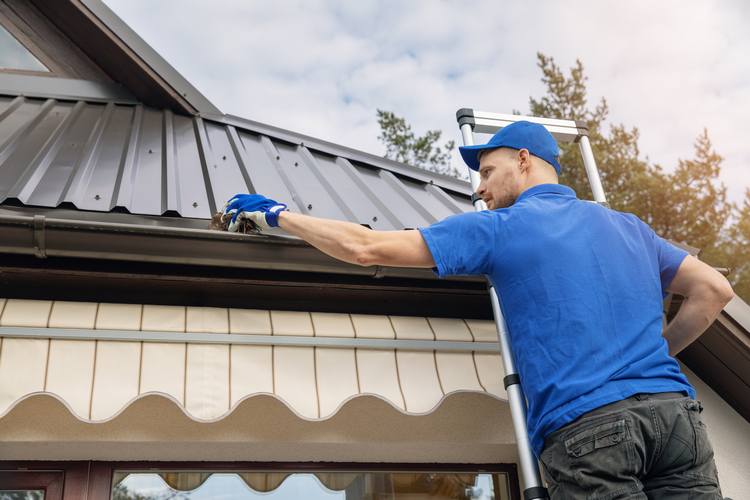
In places where it often rains, rain gutters installation and downspouts are really important for houses. These parts do a big job by collecting rainwater and moving it away from the house’s base. This helps avoid problems like dirt washing away, damage to the sides of the house, and water getting into the basement or crawlspaces.
While some people hire professionals such as GutterItUp to install rain gutters, doing it yourself is also possible. You can get all the things you need for gutter installation from local hardware stores. If you’re thinking about changing or putting up gutters and downspouts, it’s a good chance to not only make them work better but also make your home look nicer.
In this guide, we’ll talk about how to install new rain gutters, which are a smooth and effective choice compared to the usual gutters. Please keep on reading!
Overview of Rain Gutters Installation
Rain gutters are essential components installed along the edges of a roof to collect and direct rainwater away from a building. They typically consist of troughs or channels, downspouts, and various accessories. The key functions of rain gutters include preventing soil erosion around the foundation, minimizing splashing on siding, and averting water-related damage to basements or crawlspaces.
Rain gutters consist of several essential parts and mounting details, working together to effectively manage rainwater. Here’s an overview of the key components:
1. Gutter Troughs
These are the channels or troughs attached along the eaves of the roof to collect rainwater.
Available in various materials, including aluminum, vinyl, steel, and copper.
Different styles, such as K-style and half-round, offer functional and aesthetic choices.
2. Downspouts
Vertical pipes that carry rainwater from the gutters to the ground or a drainage system. Directs water away from the building’s foundation to prevent erosion and potential damage. Come in different sizes and shapes to accommodate varying water volumes.
3. End Caps
Installed at the ends of gutter troughs to close them off. Prevents water from leaking out at the edges and enhances the gutter’s overall effectiveness.
4. Elbows and Downspout Brackets
Elbows allow for changes in the direction of downspouts. Brackets secure downspouts to the exterior walls, providing stability and support.
5. Gutter Hangers
Attached to the roof’s fascia or rafter tails to support the weight of the gutters. Available in different styles, including spike-and-ferrule hangers and strap hangers.
6. Splash Blocks or Downspout Extensions
Placed at the base of downspouts to disperse water and prevent soil erosion. Extensions guide water away from the building’s foundation.
7. Mounting Details
Proper rain gutter installation involves securing hangers at regular intervals, ensuring a stable and even support structure. The slope of the gutters is important to facilitate water flow toward downspouts. Typically, a quarter-inch slope for every ten feet is recommended.
Seams and joints should be securely sealed to prevent leaks. Regular maintenance, including cleaning debris and checking for proper alignment, is crucial for optimal performance.
Understanding these rain gutter parts and mounting details is essential for effective rainwater management and the overall protection of a home’s structure.
Rain Gutter Installation in 8 Simple Steps
Follow the below given steps for easy and smooth gutter installation:
Step 1: Mark Your Points
Find the highest spot on the fascia board where the rain gutter installation will take place. Typically, it’s around 1 ¼ inches below the metal drip-edge flashing. On wider fascia, the gutter might sit a bit lower. At the opposite end of the fascia (or where the downspout is planned, especially if it’s in the middle), mark the lowest point of the gutter run. Keep in mind the slope requirement – about ½ inch for every 10 feet of gutter. Connect these two points using a chalk line.
Quick tip: Before starting the gutter installation, check the fascia for any signs of rot and fix it if needed.
Step 2: Affixing Fascia Supports
Identify the rafter tails positioned behind the fascia; they are usually spaced 16 inches apart (locate the distinct nail heads for guidance). Mark the chalk line on every second rafter tail. Create a ⅛-inch-diameter pilot hole through the fascia and into each marked rafter tail. Secure fascia supports using ¼-inch stainless steel lag screws. Ensure the screws are long enough to penetrate the rafters by at least 2 inches.
Quick Tip: Make the task smoother by applying soap to the lag screws before driving them through the fascia and into the rafter tails. This will surely have a positive impact on your rain gutter installation process.
Step 3: Trimming the Gutter to Size
Adjust the gutter’s length using a hacksaw and aviation snips, or opt for a 12-inch power miter saw equipped with a carbide-tipped finish blade. When the gutter extends around a corner, cut the necessary angle, typically 45 degrees, on that end. For runs requiring two gutter sections, overlap them by 8 inches. Connect using 3/8-inch-long, self-tapping stainless steel screws or pop rivets arranged in two rows of four each.
Quick Tip: When securing, position screws or rivets on the sides of the gutter, avoiding placement in the bottom.
Step 4: Adding End Caps
At the square-cut end of the gutter, fix a rounded end cap using aluminum pop rivets. If the gutter doesn’t turn a corner, secure an end cap at each end. Here’s how: Hold the end cap temporarily in place with a single sheet-metal screw. Then, drill a 1/8-inch-diameter hole and insert one pop rivet.
Take out the temporary screw and replace it with a rivet. For a waterproof connection, use a high-quality siliconized caulk to seal both the rivets and the seam of the end cap on the inside of the gutter.
Step 5: Creating Downspout Openings
It’s another important and carefully done step in rain gutter installation. Utilize a downspout outlet to indicate where the downspout should go on the lower end of the gutter. Turn the gutter upside down and position the outlet on top. Outline the inside of the outlet to mark the downspout hole on the gutter. Drill a ¼-inch-diameter hole at the center of the circular outline. Flip the gutter over and carve the downspout hole using a 4-inch-diameter hole saw attached to a drill. Alternatively, you can use a hammer and cold chisel for this task.
Step 6: Putting Up the Gutter
Place the gutter into the brackets attached to the fascia using lag screws. Lift the gutter upwards until its back edge slides into the hooks at the top of the brackets. Drill a 3/16-inch-diameter hole in the front edge of the gutter through the screw-mounting hole in each bracket. Secure the gutter to the bracket using a 1-inch-long #8-32 stainless steel machine screw and flanged nut.
Quick Tip: If you want, you can spray-paint aluminum gutters and brackets to match or contrast with the house trim.
Step 7: Creating a Corner Strip Miter Joint
To neatly connect two gutter lengths at each corner, utilize a strip miter—a 3-inch-wide aluminum strip. Wrap the aluminum strip securely around the underside of the gutter, fastening it with eight pop rivets or sheet-metal screws. Using snips, cut a triangular section from the top of the strip miter. Fold down the two flaps around the top edge of the gutter for a tidy finish. For enhanced water resistance, consider applying a top-quality siliconized caulk to reinforce this joint.
Step 8: Connecting Downspout to Gutter
Attach the downspout outlet to the gutter using four pop rivets or screws. Screw a downspout elbow onto the outlet tube extending downward from the gutter. Position another elbow against the house and trim a piece of downspout to fit between the two elbows. Slightly crimp the elbow with needle-nosed pliers to ensure a snug fit into the downspout. Secure the components together using pop rivets or screws.
Quick Tip: For a one-story house, use two downspout brackets; for a two-story house, opt for three brackets.
Final Words
Installing rain gutters is a straightforward process by following the steps mentioned above. However, for a hassle-free and professionally done rain gutter installation, it’s recommended to get the services of a reputable gutter company GutterItUp. These professionals are experienced, charge reasonable rates, and provide top-notch services. Opting for a professional touch ensures that your rain gutters are installed efficiently, giving you peace of mind and a reliable rainwater management system for your home.